Using Bundlr in a React Web App
WebBundlr is to the browser as NodeJS is to the server. WebBundlr is how you create web-based apps where users can upload files directly to the permaweb from their browser.
In this tutorial, you will build a series of React components that interact with our SDK, including:
- Funding a Bundlr node
- Checking your balance on the Bundlr node
- Uploading a normal-sized file
- Uploading larger files and using a progress bar to update the user
The components are designed to be completely modular, you can easily use them as a base when building your own applications.
The full code for this tutorial can be found in our GitHub ... but ... if you want a hack for learning this material quickly, try working through it without using copy and paste. I know it can be tempting to just grab the code from GitHub or copy and paste from here, but that doesn't help with memorization. If you want to memorize this, type it in line by line. When you get errors or make mistakes, first try to fix them yourself. If you're still stuck, then go back and compare against the source.
With Bundlr, you pay once to upload, and your data is stored on Arweave forever. Since this is a tutorial, you shouldn't have to spend any money. We'll use the Bundlr devnet and fund it with free Mumbai MATIC. Files uploaded to the devnet are available for approximately 60 days.
Setup
Start by following this tutorial to create a React project with support for the Bundlr SDK.
Then add support for React Router DOM by running this from your command line.
npm install react-router-dom
Tailwind
We’ll use Tailwind instead of plain CSS for styling, but you’re welcome to style things any way you like.
Install tailwindcss via npm, and create your tailwind.config.js file.
npm install -D tailwindcss
npx tailwindcss init
Add the paths to all of your template files in your tailwind.config.js file.
/** @type {import('tailwindcss').Config} */

module.exports = {
    content: ["./src/**/*.{js,jsx,ts,tsx}"],
    theme: {
        extend: {},
    },

    plugins: [],
};
Modify your src/index.css file so it looks like this:
@tailwind base;
@tailwind components;
@tailwind utilities;
Run this from your command line
npx tailwindcss -i ./src/input.css -o ./dist/output.css --watch
Color is really important to me. One of the first things I do when starting a new tutorial is to search for color palettes that match the feeling of the app I'm building. If I'm coding something for a corporate client, I'll use their brand colors. To make it really easy to both define and switch colors (if needed), I first modify my app/index.css file with CSS variables defining the colors I'll need.
:root {
    --background: #181818;
    --primary: #67d4dd;
    --secondary: #c9fd5c;
    --text: #ffffff;
    --errorText: #ff0000;
}

html {
    width: 100%;
    height: 100%;
    background-color: #181818;
}
And then modify my tailwind.config.js to use those CSS variables.
/** @type {import('tailwindcss').Config} */

module.exports = {
    content: ["./src/**/*.{js,jsx,ts,tsx}"],
    theme: {
        extend: {
            colors: {
                background: "var(--background)",
                primary: "var(--primary)",
                secondary: "var(--secondary)",
                text: "var(--text)",
                messageText: "var(--errorText)",
            },
        },
    },

    plugins: [],
};
By defining the colors first in CSS and then using them in Tailwind, I can access the values when coding for Tailwind and via JavaScript / CSS. It's a technique that works well for me, but if you'd rather use default tailwind colors, you're more than welcome to.
RainbowKit
The last little bit of setup is adding support for RainbowKit and the WAGMI hooks for React. RainbowKit makes it super easy to integrate support for MetaMask and other Ethereum-based wallets into your React-based dApp. It's not the only way to do things, but it makes things very very easy.
Install RainbowKit and related dependencies.
npm install @rainbow-me/rainbowkit wagmi ethers@5
Replace your src/App.js file with the following.
import "./index.css";
import ProgressBarPage from "./pages/ProgressBarPage";
import { BrowserRouter, Routes, Route } from "react-router-dom";

import "@rainbow-me/rainbowkit/styles.css";

import { getDefaultWallets, RainbowKitProvider, darkTheme } from "@rainbow-me/rainbowkit";
import { chain, configureChains, createClient, WagmiConfig } from "wagmi";
import { alchemyProvider } from "wagmi/providers/alchemy";
import { publicProvider } from "wagmi/providers/public";

const { chains, provider } = configureChains(
    [chain.polygonMumbai],
    [alchemyProvider({ apiKey: process.env.ALCHEMY_ID }), publicProvider()],
);

const { connectors } = getDefaultWallets({
    appName: "Bundlr Tools",
    chains,
});

const wagmiClient = createClient({
    autoConnect: true,
    connectors,
    provider,
});

function App() {
    return (
        <WagmiConfig client={wagmiClient}>
            <RainbowKitProvider
                chains={chains}
                theme={darkTheme({
                    accentColor: "var(--primary)",
                    accentColorForeground: "var(--background)",
                    borderRadius: "small",
                    fontStack: "system",
                    overlayBlur: "small",
                })}
            >
                <BrowserRouter>
                    <Routes>
                        <Route path="/" element={<ProgressBarPage />} />
                        <Route path="/progress-bar" element={<ProgressBarPage />} />
                    </Routes>
                </BrowserRouter>
            </RainbowKitProvider>
        </WagmiConfig>
    );
}

export default App;
Most of App.js will look familiar if you've done any React coding, but there is some RainbowKit-specific stuff too.
This block of code configures the blockchains our application can connect to. Since we're only connecting to the Bundlr devnet, we'll offer Polygon Mumbai as an option. If you expand on this tutorial and want to work with different blockchains, this is where you'd add support for them.
const { chains, provider } = configureChains(
    [chain.polygonMumbai],
    [alchemyProvider({ apiKey: process.env.ALCHEMY_ID }), publicProvider()],
);
Your entire application needs to be wrapped with RainbowKitProvider and WagmiConfig. In my code, I further configure the colors used in the connect button and add support for react-router-dom. Here's a version of the code with just the bare necessities so you can focus on what's required.
const App = () => {
    return (
        <WagmiConfig client={wagmiClient}>
            <RainbowKitProvider chains={chains}>
                <YourApp />
            </RainbowKitProvider>
        </WagmiConfig>
    );
};
Finally, create some new directories and files in your code editor.
First the components:
components/FundNode.js.
import React from "react";

const FundNode = () => {
    return <div>FundNode</div>;
};

export default FundNode;
components/NodeBalance.js.
import React from "react";

const NodeBalance = () => {
    return <div>NodeBalance</div>;
};

export default NodeBalance;
components/NormalUploader.js.
import React from "react";

const NormalUploader = () => {
    return <div>NormalUploader</div>;
};

export default NormalUploader;
components/ProgressBarUploader.js.
import React from "react";

const ProgressBarUploader = () => {
    return <div>ProgressBarUploader</div>;
};

export default ProgressBarUploader;
And then the pages
pages/NormalUploaderPage.js
import React from "react";

const NormalUploaderPage = () => {
    return <div>NormalUploaderPage</div>;
};

export default NormalUploaderPage;
pages/LargeFileUploaderPage.js
import React from "react";

const LargeFileUploaderPage = () => {
    return <div>LargeFileUploaderPage</div>;
};

export default LargeFileUploaderPage;
Ok, cool, cool, cool. You should be good to go at this point. Run npm run start from your command line, and marvel at the blank page that shows in your browser.
Remember, if you get lost, or your code's just not working, you can always check out the full version in GitHub.
If you're still stuck, just Tweet at us or jump into our Discord, and we'll give you a hand.
Wallet Connect
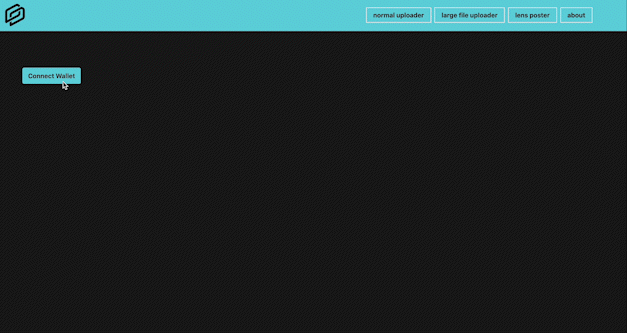
If you've ever manually coded a wallet connect button, you know it's an involved process. You've got to style the button and then code everything to interact with the blockchain. When working with RainbowKit, all you've got to do is throw in that <ConnectButton /> tag. I like to use the optional showBalance property to show your MATIC balance once logged in (<ConnectButton showBalance={true} />), there are even a bunch more properties that can be added too.
Funding A Node
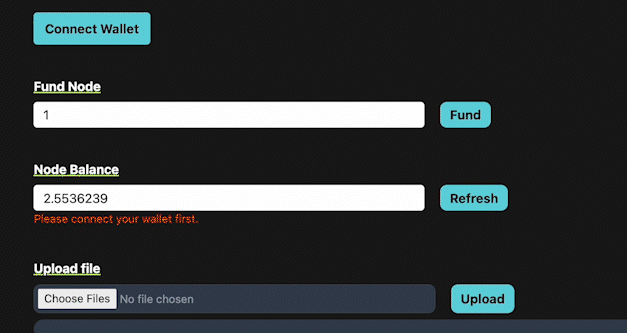
OK, let's dig in and start interacting with Bundlr. Type the following into components/FundNode.js.
import React, { useState } from "react";import BigNumber from "bignumber.js";import { useProvider, useSigner } from "wagmi";import { WebBundlr } from "@bundlr-network/client";const FundNode = () => { const [fundAmount, setFundAmount] = useState(1); const [fundMessage, setFundMessage] = useState(""); const rainbowKitProvider = useProvider(); const { data: rainbowKitSigner, isError, isLoading } = useSigner(); const fundNode = async () => { if (!rainbowKitSigner) { setFundMessage("Please connect your wallet first."); return; } // use method injection to add the missing function rainbowKitProvider.getSigner = () => rainbowKitSigner; // create a WebBundlr object const bundlr = new WebBundlr("https://devnet.bundlr.network", "matic", rainbowKitProvider, { providerUrl: "https://rpc-mumbai.matic.today", }); await bundlr.ready(); const fundAmountParsed = new BigNumber(fundAmount).multipliedBy(bundlr.currencyConfig.base[1]); await bundlr .fund(fundAmountParsed.toString()) .then((res) => { setFundMessage("Wallet Funded"); }) .catch((e) => { console.log(e); setFundMessage("Error While Funding ", e.message); }); }; return ( <div className="px-10 py-5 flex flex-col" id="fund_container"> <label className="pr-5block mb-2 text-sm font-medium text-text" for="file_input"> Fund Node </label> <div className="flex flex-row"> <input className="rounded w-1/3 pl-3 focus:outline-none text-black" type="number" value={fundAmount} onChange={(e) => setFundAmount(e.target.value)} /> <button class="ml-5 bg-primary text-background font-bold py-1 px-3 rounded-lg" onClick={fundNode}> Fund </button> </div> <p className="text-messageText text-sm">{fundMessage}</p> </div> );};export default FundNode;Provider And Signers
In a normal web environment, your browser connects directly to the internet using the http protocol. It then downloads data and displays it in your browser.
In a web3 environment, your browser talks to your wallet, which facilitates communication with blockchains. The specific wallet component the browser interacts with is called a "provider".
A "signer" comes into play when storing data on the blockchain. It "signs" each transaction with your private key, allowing people to ensure the transaction came from you and you only.
It's more complex than this, but for now, take the TL;DR that providers let you read data from a blockchain, and signers let you write data back to it.
The WAGMI hooks for React make it super easy to get a reference to the provider and signer associated with the logged-in wallet. Calling useProvider() returns a reference to the provider, and calling useSigner() provides a reference to the signer.
const rainbowKitProvider = useProvider();
const { data: rainbowKitSigner, isError, isLoading } = useSigner();
The signer object reference will return null if the user has yet to connect their wallet.
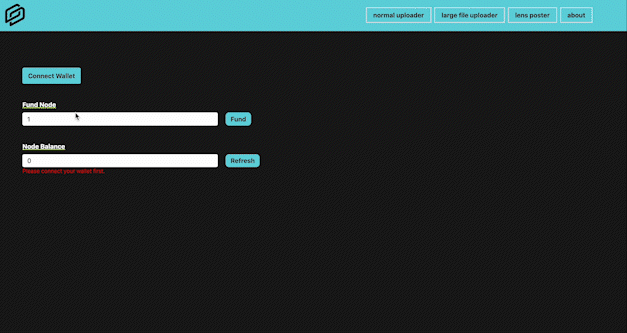
Funding Step By Step
When working with Bundlr, you fund a node, and your balance exists on that node only. You'll need to upload your data to the node you funded, not a different one. Regardless of the node you fund, your data always ends up on the same Arweave blockchain. As this is a tutorial, we will be funding the devnet and not a public node.
Look again at the code for components/FundNode.js, explicitly focusing on the fundNode() function on lines 12-37.
Here's what happens:
- Check the user has already clicked "Connect Wallet"; if not, show an error message and return.
if (!rainbowKitSigner) {
    setFundMessage("Please connect your wallet first.");
    return;
}
- Due to some differences between how RanibowKit models Providers and how Bundlr does, this line is necessary to prevent errors down the line.
rainbowKitProvider.getSigner = () => rainbowKitSigner;
- Connect to the Bundlr devnet, specifying that we will be funding using (Mumbai) MATIC.
const bundlr = new WebBundlr("https://devnet.bundlr.network", "matic", rainbowKitProvider, {
    providerUrl: "https://rpc-mumbai.matic.today",
});
await bundlr.ready();
- Convert our funding amount to atomic units.
const fundAmountParsed = new BigNumber(fundAmount).multipliedBy(bundlr.currencyConfig.base[1]);
Atomic units are a way to represent a floating point (decimal) number using non-decimal notation. They are commonly used to help ensure accuracy when performing mathematical operations on fractional numbers in JavaScript,
- Finally, fund the node, and display either a success or failure message.
await bundlr
    .fund(fundAmountParsed.toString())
    .then((res) => {
        setFundMessage("Wallet Funded");
    })
    .catch((e) => {
        console.log(e);
        setFundMessage("Error While Funding ", e.message);
    });
As you can see, the actual funding of the node is just one line of code; the rest is just setup and error checking. Make sure you understand each of the steps. As we dig into the subsequent components, I'll skip over the setup and just dive into the part we're focusing on.
Checking Node Balance
Depending on the currency you use to fund a node, your balance will post anywhere from a few milliseconds to upwards of 40 minutes. With MATIC, balances post almost instantaneously. Let's dig in and look at how to check a funded balance and display it in the UI. Again, I will focus mainly on the Bundlr-specific JavaScript and not too much on the React code.
Type the following code into your components/NodeBalance.js file.
import React, { useState, useEffect } from "react";import { useProvider, useSigner } from "wagmi";import { WebBundlr } from "@bundlr-network/client";const NodeBalance = () => { const [nodeBalance, setNodeBalance] = useState(0); const [balanceMessage, setBalanceMessage] = useState(""); const rainbowKitProvider = useProvider(); const { data: rainbowKitSigner, isError, isLoading } = useSigner(); const updateNodeBalance = async () => { if (!rainbowKitSigner) { setBalanceMessage("Please connect your wallet first."); return; } // use method injection to add the missing function rainbowKitProvider.getSigner = () => rainbowKitSigner; const bundlr = new WebBundlr("https://devnet.bundlr.network", "matic", rainbowKitProvider, { providerUrl: "https://rpc-mumbai.matic.today", }); const curBalance = await bundlr.getBalance(rainbowKitSigner._address); setNodeBalance(bundlr.utils.fromAtomic(curBalance).toFixed(7, 2).toString()); setBalanceMessage("Node balance updated."); }; useEffect(() => { updateNodeBalance(); }, [rainbowKitSigner]); return ( <div className="px-10 py-5 flex flex-col" id="balance_container"> <label className="pr-5block mb-2 text-sm font-medium text-text" for="file_input"> Node Balance </label> <div className="flex flex-row"> <input className="rounded w-1/3 pl-3 focus:outline-none text-black" type="number" readonly value={nodeBalance} /> <button class="ml-5 bg-primary text-background font-bold py-1 px-3 rounded-lg" onClick={updateNodeBalance} > Refresh </button> </div> <p className="text-messageText text-sm">{balanceMessage}</p> </div> );};export default NodeBalance;Much of this code is similar to what we used in components/FundNode.js, so I've only highlighted lines 22 and 23.
In line 22, I pass the address of the logged-in wallet (rainbowKitSigner._address) to the bundlr.getBalance() function. I use the await which waits for a Promise and gets its fulfillment value. Then in line 23, I convert from atomic units to something easily readable and set it to a React state variable. Here are those two lines are again.
const curBalance = await bundlr.getBalance(rainbowKitSigner._address);
setNodeBalance(bundlr.utils.fromAtomic(curBalance).toFixed(7, 2).toString());
Uploading A Normal-Sized File
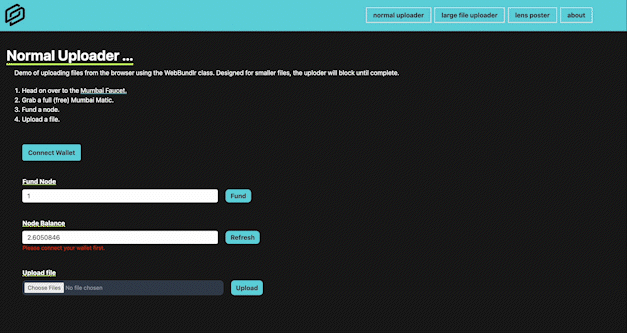
Nice, good job making it this far. Now that you can connect to a node and fund it, you can start building some cool stuff on top. This next component allows you to upload a file directly from the browser to Arweave via Bundlr. The actual upload is facilitated by the SDK function bundlr.upload(), we call the function with the await keyword, meaning it blocks until the file is fully uploaded. This technique works for "normal-sized" files, any file that can be uploaded in a few seconds.
Type the following code into components/NomralUploader.js.
import React, { useState, useRef } from "react";import { useProvider, useSigner } from "wagmi";import { WebBundlr } from "@bundlr-network/client";import fileReaderStream from "filereader-stream";const NormalUploader = () => { const [message, setMessage] = useState(""); const [uploadedURL, setUploadedURL] = useState(""); const [fileToUpload, setFileToUpload] = useState(); const [fileType, setFileType] = useState(); const totalChunks = useRef(0); const rainbowKitProvider = useProvider(); const { data: rainbowKitSigner, isError, isLoading } = useSigner(); const handleFile = async (e) => { setMessage(""); const newFiles = e.target.files; if (newFiles.length === 0) return; setFileToUpload(newFiles[0]); setFileType(newFiles[0]["type"]); }; const upload = async () => { if (!rainbowKitSigner) { setMessage("Please connect your wallet first."); return; } if (!fileToUpload) { setMessage("Please select a file first."); return; } // use method injection to add the missing function rainbowKitProvider.getSigner = () => rainbowKitSigner; // create a WebBundlr object const bundlr = new WebBundlr("https://devnet.bundlr.network", "matic", rainbowKitProvider, { providerUrl: "https://matic-mumbai.chainstacklabs.com", }); await bundlr.ready(); try { const dataStream = fileReaderStream(fileToUpload); const tx = await bundlr.upload(dataStream, { tags: [{ name: "Content-Type", value: fileType }], }); console.log(`File uploaded ==> https://arweave.net/${tx.id}`); setMessage(`Upload Success:`); setUploadedURL("https://arweave.net/" + tx.id); } catch (e) { setMessage("Upload error " + e.message); console.log("error on upload, ", e); } }; return ( <div className="flex flex-col py-5 ml-10"> <label className="pr-5 block mb-2 font-bold text-text underline decoration-secondary">Upload file</label> <div className="flex flex-row"> <input type="file" onChange={handleFile} className="w-1/3 px-1 py-1 block text-sm text-gray-900 border border-gray-300 rounded-lg cursor-pointer bg-gray-50 dark:text-gray-400 focus:outline-none dark:bg-gray-700 dark:border-gray-600 dark:placeholder-gray-400" multiple="single" name="files[]" /> <button className="ml-5 bg-primary hover:bg-blue-700 text-background font-bold py-1 px-3 rounded-lg" onClick={upload} > Upload </button> </div> <p className="text-messageText text-sm">{message}</p> <p className="text-text text-sm"> {uploadedURL && ( <a className="underline" href={uploadedURL} target="_blank"> {uploadedURL} </a> )} </p> </div> );};export default NormalUploader;Start first with the highlighted code on line 22.
setFileType(newFiles[0]["type"]);
The function setFileType() sets a state variable to correspond to the file type of the file that was selected for upload. This is important, we will need to use this value as a Content-Type tag when uploading the file to Bundlr. It's still possible to upload files without setting the Content-Type, however the browser will not be able to render it properly.
Moving down to lines 44-47, this is where the meat of the upload happens. First we convert the file object to a fileReaderStream and then we pass that stream to the bundlr.upload() function along with the Content-Type tags. The function blocks until the upload returns successfully, then updates the UI with a success message.
const dataStream = fileReaderStream(fileToUpload);
const tx = await bundlr.upload(dataStream, {
    tags: [{ name: "Content-Type", value: fileType }],
});
Uploading A Large File
For this last component, we're going to roll up our sleeves and dig in a bit to some of the more advanced SDK features. We will build a second file upload component designed for larger files. Instead of blocking with the await keyword, this version will return immediately and then use event callbacks to track upload progress and update a progress bar.
The general way to upload a file to Bundlr is to setup your reference to a node (as with the previous components we built) and then call bundlr.upload(). This technique is perfect for smaller files when the upload time will be a few seconds. A second technique called the chunked uploader is designed for larger files. It lets you pause and resume uploads, control how much data to upload in each chunk, and get event callbacks as to upload progress. We will use those event callbacks to update our progress bar.
Type the following code into components/ProgressBarUploader.js.
import React, { useState, useRef } from "react";import { useProvider, useSigner } from "wagmi";import { WebBundlr } from "@bundlr-network/client";import fileReaderStream from "filereader-stream";const ProgressBarUploader = () => { const [message, setMessage] = useState(""); const [uploadedURL, setUploadedURL] = useState(""); const [progress, setProgress] = useState(0); const [fileToUpload, setFileToUpload] = useState(); const [fileType, setFileType] = useState(); const [fileSize, setFileSize] = useState(0); const totalChunks = useRef(0); const rainbowKitProvider = useProvider(); const { data: rainbowKitSigner, isError, isLoading } = useSigner(); const handleFile = async (e) => { setMessage(""); const newFiles = e.target.files; if (newFiles.length === 0) return; setFileToUpload(newFiles[0]); setFileType(newFiles[0]["type"]); }; const upload = async () => { if (!rainbowKitSigner) { setMessage("Please connect your wallet first."); return; } if (!fileToUpload) { setMessage("Please select a file first."); return; } // Reset the progress bar setProgress(0); // use method injection to add the missing function rainbowKitProvider.getSigner = () => rainbowKitSigner; // create a WebBundlr object const bundlr = new WebBundlr("https://devnet.bundlr.network", "matic", rainbowKitProvider, { providerUrl: "https://rpc-mumbai.matic.today", }); await bundlr.ready(); const uploader = bundlr.uploader.chunkedUploader; // Change the batch size to 1 to make testing easier (default is 5) uploader.setBatchSize(1); // Change the chunk size to something small to make testing easier (default is 25MB) const chunkSize = 2000000; uploader.setChunkSize(chunkSize); // get a create a streamed reader const dataStream = fileReaderStream(fileToUpload); // save a reference to the file size setFileSize(dataStream.size); // divide the total file size by the size of each chunk we'll upload if (dataStream.size < chunkSize) totalChunks.current = 1; else { totalChunks.current = Math.floor(dataStream.size / chunkSize); } /** Register Event Callbacks */ // event callback: called for every chunk uploaded uploader.on("chunkUpload", (chunkInfo) => { console.log(chunkInfo); console.log( `Uploaded Chunk number ${chunkInfo.id}, offset of ${chunkInfo.offset}, size ${chunkInfo.size} Bytes, with a total of ${chunkInfo.totalUploaded} bytes uploaded.`, ); const chunkNumber = chunkInfo.id + 1; // update the progress bar based on how much has been uploaded if (chunkNumber >= totalChunks) setProgress(100); else setProgress((chunkNumber / totalChunks.current) * 100); }); // event callback: called if an error happens uploader.on("chunkError", (e) => { console.error(`Error uploading chunk number ${e.id} - ${e.res.statusText}`); }); // event callback: called when file is fully uploaded uploader.on("done", (finishRes) => { console.log(`Upload completed with ID ${finishRes.id}`); // set the progress bar to 100 setProgress(100); }); // upload the file await uploader .uploadData(dataStream, { tags: [{ name: "Content-Type", value: fileType }], }) .then((res) => { setMessage(`Upload Success:`); setUploadedURL("https://arweave.net/" + res.data.id); }) .catch((e) => { setMessage("Upload error ", e.message); console.log("error on upload, ", e); }); }; return ( <div className="flex flex-col py-5 ml-10"> <label className="block mb-2 text-sm font-medium text-text" for="file_input"> Upload file </label> <div className="flex flex-row"> <input type="file" onChange={handleFile} className="w-1/3 px-1 py-1 block text-sm text-gray-900 border border-gray-300 rounded-lg cursor-pointer bg-gray-50 dark:text-gray-400 focus:outline-none dark:bg-gray-700 dark:border-gray-600 dark:placeholder-gray-400" multiple="single" name="files[]" /> <button class="ml-5 bg-primary hover:bg-blue-700 text-background font-bold py-1 px-3 rounded-lg" onClick={upload} > Upload </button> </div> <div class="mt-2 w-2/3 h-6 bg-gray-200 rounded-full dark:bg-gray-700" id="progress_bar_container"> <div class="h-6 bg-blue-600 rounded-full dark:bg-blue-500" style={{ width: progress + "%" }} id="progress_bar" ></div> </div> <p className="text-messageText text-sm">{message}</p> <p className="text-text text-sm"> {uploadedURL && ( <a className="underline" href={uploadedURL} target="_blank"> {uploadedURL} </a> )} </p> </div> );};export default ProgressBarUploader;Looking at the highlighted code on lines 47-101, let's dig in and see what's going on.
- From the Bundlr node we connected to, request a reference to the chunked uploader.
const uploader = bundlr.uploader.chunkedUploader;
- Set the batch size (number of chunks to upload at once) and the chunk size (maximum size of each chunk). For this tutorial, I've set the values artificially low as I want the progress bar to increase slowly regardless of the file size you use for testing.
// Change the batch size to 1 to make testing easier (default is 5)
uploader.setBatchSize(1);
// Change the chunk size to something small to make testing easier (default is 25MB)
const chunkSize = 2000000;
uploader.setChunkSize(chunkSize);
- Convert the file to be uploaded to a data stream, and get the size of that data stream. Once we know the file size we can divide that by the previously determined chunk size to get the total number of chunks to be uploaded. From there it's simple a matter to divide our progress bar into segments based on the number of chunks to be uploaded. Then, draw a segment each time a new chunk is uploaded.
// get a create a streamed reader
const dataStream = fileReaderStream(fileToUpload);
// save a reference to the file size
setFileSize(dataStream.size);
// divide the total file size by the size of each chunk we'll upload
if (dataStream.size < chunkSize) totalChunks.current = 1;
else {
    totalChunks.current = Math.floor(dataStream.size / chunkSize);
}
- Setup event callbacks. Event callbacks are pieces of code that are invoked by the Bundlr node during our upload. There are three event types:
- chunkUpload: Emitted whenever a chunk is uploaded.
- chunkError: Emitted whenever a chunk upload fails. Due to internal retry logic, these errors can most likely be ignored as long as the upload doesn't error overall.
- done: Emitted when the upload completes.
The chunkUpload event callback is where we track how many chunks have been uploaded and then update our progress bar.
uploader.on("chunkUpload", (chunkInfo) => {
    console.log(chunkInfo);
    console.log(
        `Uploaded Chunk number ${chunkInfo.id}, offset of ${chunkInfo.offset}, size ${chunkInfo.size} Bytes, with a total of ${chunkInfo.totalUploaded} bytes uploaded.`,
    );

    const chunkNumber = chunkInfo.id + 1;
    // update the progress bar based on how much has been uploaded
    if (chunkNumber >= totalChunks) setProgress(100);
    else setProgress((chunkNumber / totalChunks.current) * 100);
});
The done event callback sets the progress bar to 100%. This is probably a bit redundant as we should get to 100% in the chunkUpload event callback, but it's here too, just in case there are some oddities while uploading.
// event callback: called when file is fully uploaded
uploader.on("done", (finishRes) => {
    console.log(`Upload completed with ID ${finishRes.id}`);
    // set the progress bar to 100
    setProgress(100);
});
Pages
Rock-n-roll, the hard part is all done. All we've got left to do is create two pages, one focused on the normal-sized uploader and one focused on the large-size uploader. I've added some styling and basic instructions that make it easy for people to quickly understand what's going on.
Type the following into pages/NormalUploaderPage.js
import React from "react";
import NormalUploader from "../components/NormalUploader";
import FundNode from "../components/FundNode";
import NodeBalance from "../components/NodeBalance";
import { ConnectButton } from "@rainbow-me/rainbowkit";

const NormalUploaderPage = () => {
    return (
        <div name="about" className="w-full h-screen bg-background text-text pt-20">
            <div className="flex flex-col items-start w-full h-full pt-10">
                <div className="pl-5 w-full">
                    <div className="text-left pb-8">
                        <p className="text-4xl font-bold inline border-b-4 border-secondary">Normal Uploader ...</p>
                        <p className="text-base mt-3 ml-5">
                            Demo of uploading files from the browser using the WebBundlr class. Designed for smaller
                            files, the uploder will block until complete.
                            <br />
                        </p>
                        <ol className="ml-5 mt-5 list-decimal list-inside ">
                            <li>
                                Head on over to the{" "}
                                <a
                                    className="underline decoration-primary"
                                    href="https://mumbaifaucet.com/"
                                    target="_blank"
                                >
                                    Mumbai Faucet.
                                </a>
                            </li>
                            <li>Grab a full (free) Mumbai Matic.</li>
                            <li>Fund a node.</li>
                            <li>Upload a file.</li>
                        </ol>
                    </div>
                </div>

                <div className="pl-5 pr-5 w-full ">
                    <div className="px-10 py-5" id="connect_container">
                        <ConnectButton showBalance={true} />
                    </div>
                    <FundNode />
                    <NodeBalance />
                    <NormalUploader />
                </div>
            </div>
        </div>
    );
};
export default NormalUploaderPage;
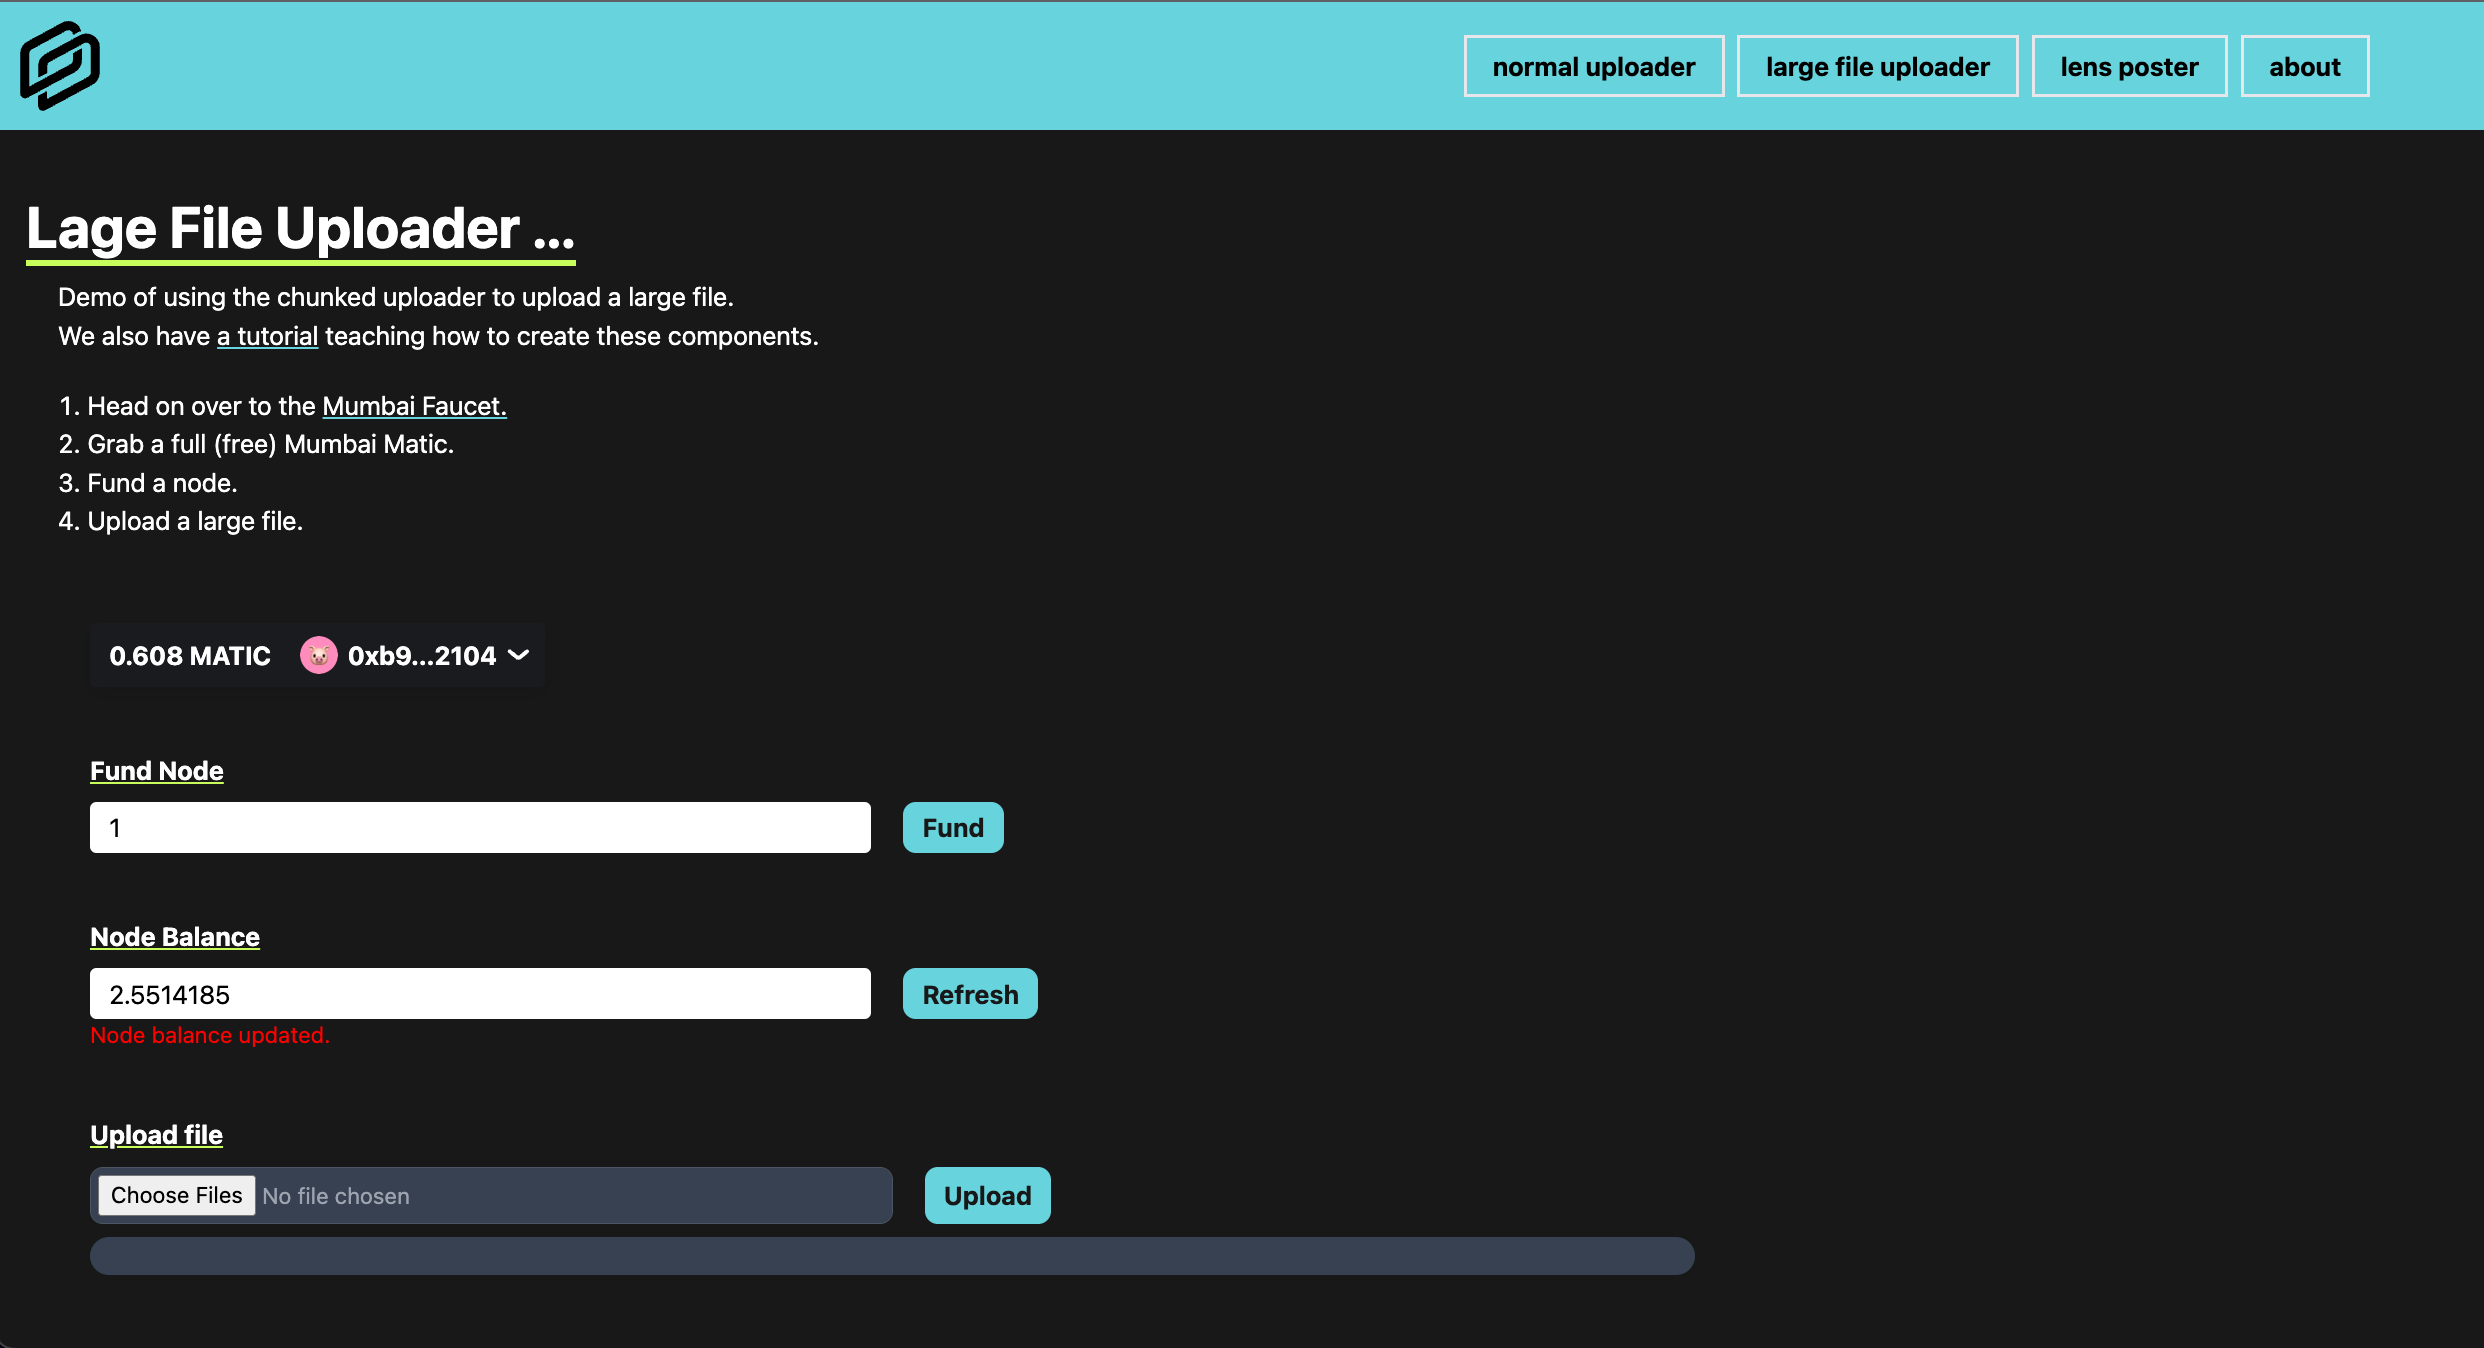
Type the following into pages/LargeFileUploaderPage.js
import React from "react";
import ProgressBarUploader from "../components/ProgressBarUploader";
import FundNode from "../components/FundNode";
import NodeBalance from "../components/NodeBalance";
import { ConnectButton } from "@rainbow-me/rainbowkit";

const LargeFileUploaderPage = () => {
    return (
        <div name="about" className="w-full h-screen bg-background text-text pt-20">
            <div className="flex flex-col items-start w-full h-full pt-10">
                <div className="pl-5 w-full">
                    <div className="text-left pb-8">
                        <p className="text-4xl font-bold inline border-b-4 border-secondary">Lage File Uploader ...</p>
                        <p className="text-base mt-3 ml-5">
                            Demo of using the chunked uploader to upload a large file. <br />
                            We also have <a
                                className="underline decoration-primary"
                                href="https://docs.bundlr.network/tutorials/WebBundlr-ProgressBars"
                            >
                                a tutorial
                            </a> teaching how to create these components.
                        </p>
                        <ol className="ml-5 mt-5 list-decimal list-inside ">
                            <li>
                                Head on over to the{" "}
                                <a
                                    className="underline decoration-primary"
                                    href="https://mumbaifaucet.com/"
                                    target="_blank"
                                >
                                    Mumbai Faucet.
                                </a>
                            </li>
                            <li>Grab a full (free) Mumbai Matic.</li>
                            <li>Fund a node.</li>
                            <li>Upload a large file.</li>
                        </ol>
                    </div>
                </div>

                <div className="pl-5 pr-5 w-full ">
                    <div className="px-10 py-5" id="connect_container">
                        <ConnectButton showBalance={true} />
                    </div>
                    <FundNode />
                    <NodeBalance />
                    <ProgressBarUploader />
                </div>
            </div>
        </div>
    );
};
export default LargeFileUploaderPage;
Conclusion
Wow. Good work on making it this far. Not only did you learn how to fund a node, check node balance and upload a file, but you also created four React components you can drop into any project you're building.
I encourage you to take a little break here, go walk around, maybe have a cup of coffee ... and then come back and build a little more. Doing a tutorial is a great way to start a learning process, and expanding on that tutorial is a great way to make what you learned stick in your brain.
Some ideas for what you can do next:
- Add filtering to the image uploaders to only accept certain types of files.
- Create an image uploader that tracks all images uploaded and shows them in a gallery.
- Create a juke-box app allowing people to upload .mp3 files and then listen to them.